 |
This article falls under the category Expert Mode.
To avoid frustration or confusion, we recommend getting familiar with the Expert Mode first. Further more, in-depth knowledge of Gameplay Basics is assumed at Expert Mode articles.
| ||||||
| This article is a stub. You can help Journey Wiki by expanding it. |
Super Boost at the Super Boost Ravine (CS OOB)
Super Boost is a flying technique that involves Charge Boosting or Dropshooting with a stuck and close-up camera aiming directly to the ground. It is only possible at certain places. Super Boost points can be seen as Charge Boost/Dropshoot points that gives a better boost.
How to Super Boost[]
Difficulty: ![]() or
or ![]() : Not very difficult in itself, but requires time to get used to it and use every Super Boost points efficiently.
: Not very difficult in itself, but requires time to get used to it and use every Super Boost points efficiently.
Dropshoot or Chargeboost but in specific locations. Some of these points are listed below. Anytime you see a close-up camera in-game (often OOB) it should be possible to super boost, like on the picture below. The more vertical the camera angle is, the best your boost can be.


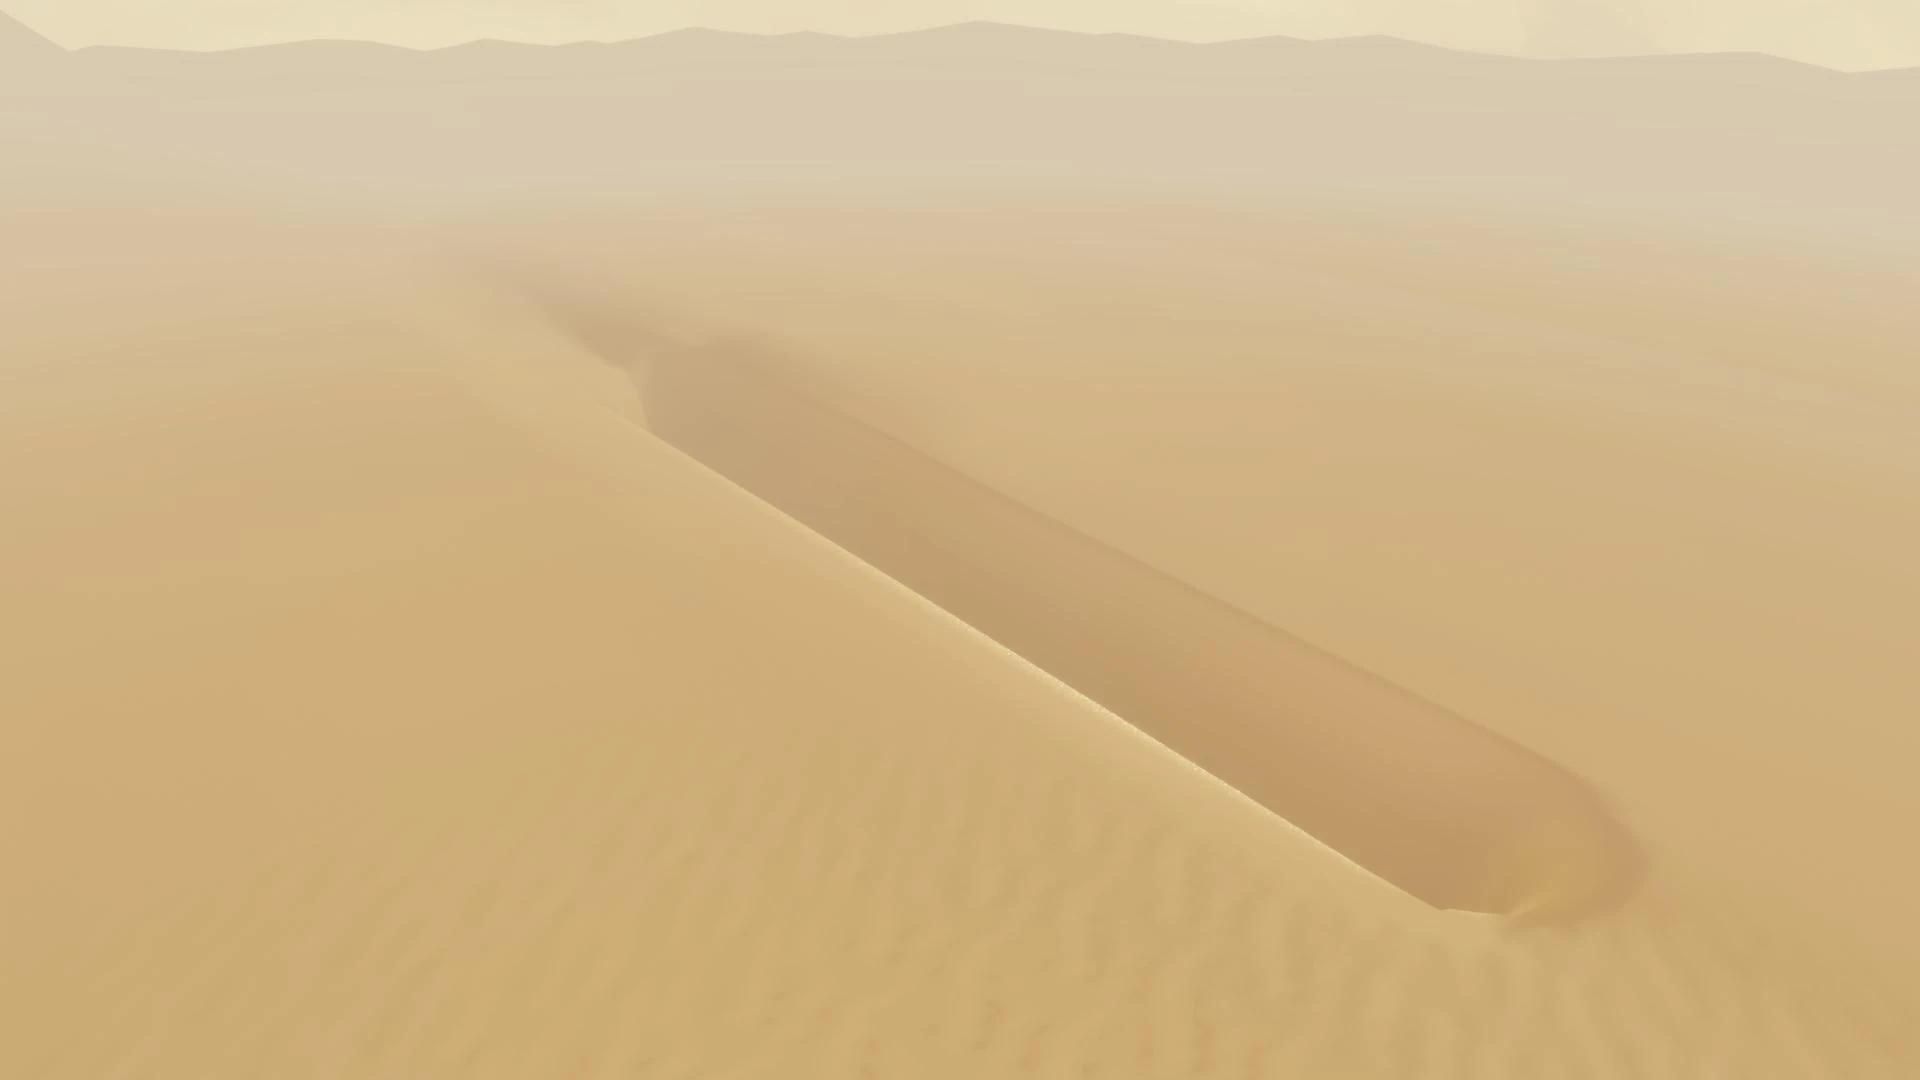
Sunken City, OOB: Super boost point
Super Charge Boost points[]
It seems the super Charge Boost points are even easier to use when compared to normal Charge Boost points (at least for the Super boost ravine of CS). Simply run in the wall to start charging, without even jumping away before diving in the CB point like you would normally do.
Hold the camera to the ground when charging, and move towards the camera to boost (jump to trigger the boost if needed).
There are many super boost points in most levels when OOB at the East or South edge of solid sand/end of terrain. Depending on the level the East edge can work better than the South one and vice versa.
To use them, dive or run towards the level border from the outer side (no visible ground below you) and start charging against the solid sand/snow. Some places will work better than others, depending mostly on how well you can go under the border. (It can even make you sanded).
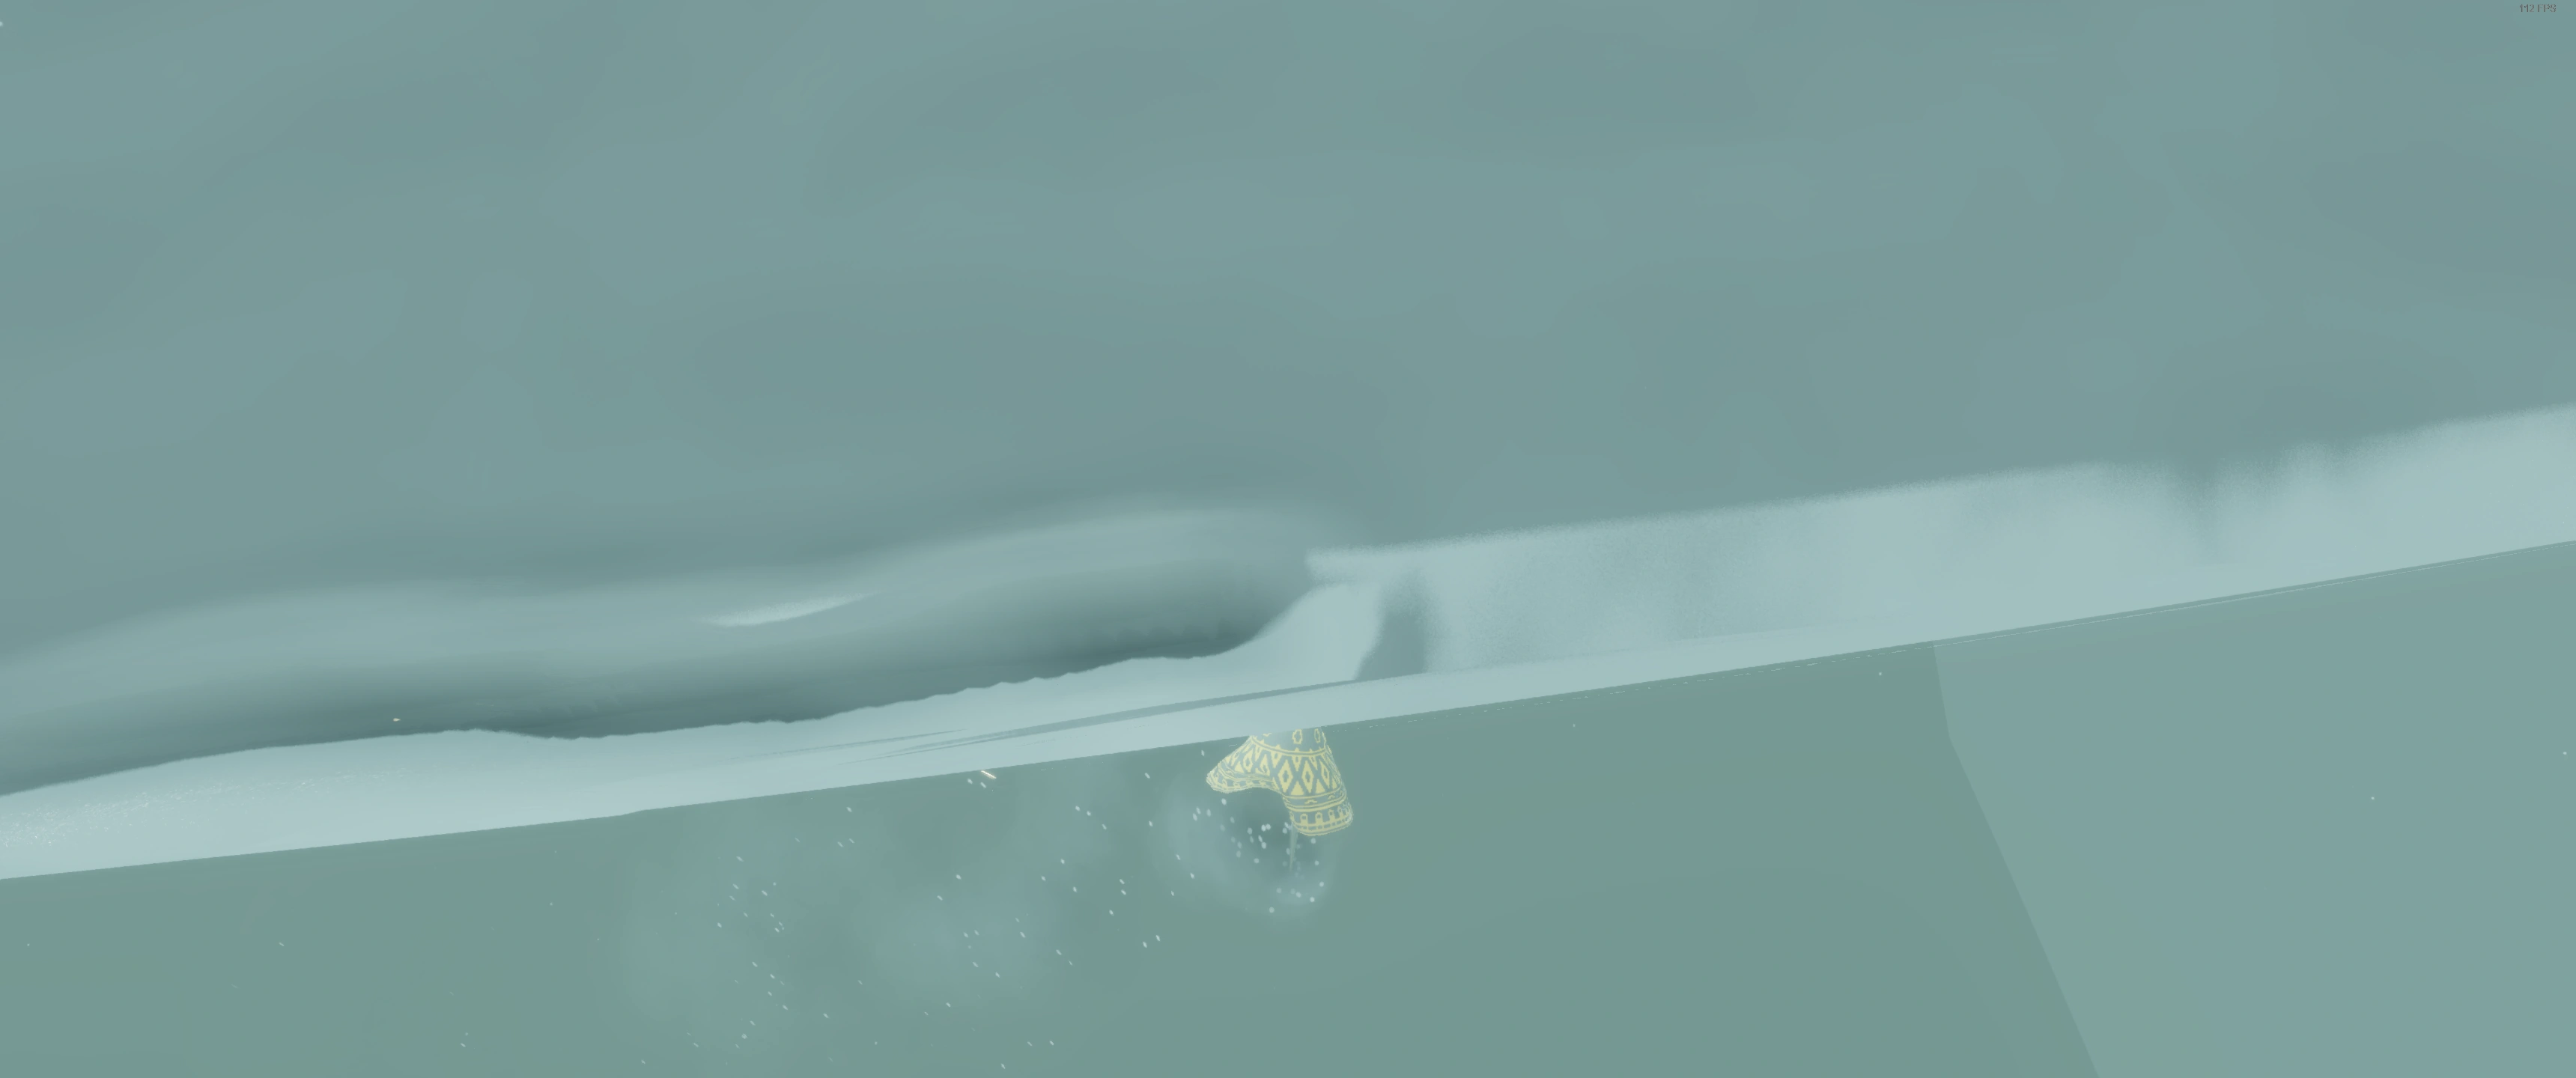
Sometimes it also works to charge against the invisible floor instead of the solid sand. In some places, such as where the pictures below were taken in snow level, it's hard to maintain a grip with the ground and you can loose your scarf charge during the charge boost. In this case the boost will be weaker.
To boost out of such an edge it might be needed to hold jump for a bit if you are deep inside. After charging a little, some places can eject you on their own (you should embrace it and boost).

Charging against the East edge of solid sand in Snow level


Super Charge Boost Point in Chapter Select, video
Super Dropshoot points[]
You can start a dropshoot like normal and finish it in a super boost point when running on the ground, or directly start in the super boost point.
When starting the dropshoot with a close-up camera, sometimes you can simply run on the ground and you will start charging immediately without needing a jump beforehand to initiate the DS. The camera needs to be aimed a lot towards the ground for this to work though, not all super dropshoot locations will allow it. This is easier done by running against a hill ; exactly like when doing a super chargeboost, but you will still slowly move forward because the hill isn't as steep, or because the camera angle is not vertical enough.
In general, it seems best to boost before, or the moment you quit the closeup camera zone. Otherwise the boost can be cancelled/reduced rather fast when the camera levels out. Some Super DS points can have a more inconsistent camera angle and are therefore harder to use efficiently (like in UG Starfields, South at some places).
It also seems important to flick the camera strictly left and right from time to time depending on the super boost point (like you would to dropshoot "normally" on long distances, or to build a stronger boost). This will keep the camera straight to the ground and allow you to obtain a powerful boost. It can also possibly make you move forward slower when dropshooting against a hill, and allow to charge longer/better.
![]() On some Super Boost points, big chirps can be used to charge for longer ; especially when dropshooting up a hill, as you can't run in circles here to stay forever in the super boost point. Sometimes however it feels like they can make you get out of the super boost zone quicker and even reduce the boost. Don't use them when you DS very slowly forward already, like in the UG Starfields video below.
On some Super Boost points, big chirps can be used to charge for longer ; especially when dropshooting up a hill, as you can't run in circles here to stay forever in the super boost point. Sometimes however it feels like they can make you get out of the super boost zone quicker and even reduce the boost. Don't use them when you DS very slowly forward already, like in the UG Starfields video below.
Simply dropshooting over the invisible ground outside of a map terrain (when no solid sand under you) often results in super boost points for many places (see below Sunken City example near the History lesson).
Common Mistakes and Further Tips[]
- To start a dropshoot at the right moment when diving from a high point in OOB over invisible ground, use your ears to hear yourself getting close to the invisible surface, and time the jump accordingly.
- Don't forget to boost the moment your camera levels out if you quit the super dropshoot point.
Some Super Boost Points[]
- To use the super boost ravine (CS OOB, North-East) pictured below, run against either one of the 2 slopes, from the bottom of the ravine. See the video at the top of this article. Click for video.

"Super boost ravine", North of the Chapter Select OOB
- In the starfields of UG when in OOB, South. To use them, when close to the entrance gate tunnel, dropshoot upward (towards the East or the West slope). The camera will go on top of you in some points ; making you dropshoot very slowly, and the boost will be powerful. The camera can be a little inconsistent here and it can be hard to find the best location for a powerful boost.
UG starfields, South
- In UG OOB when running upward on the slopes of the East or West plateau to the North (HL banner room, below the disco wayfarer locations).
UG, HL Banner room, North
- Near the HL banner in SC OOB, North, where the camera gets in a close-up position, directly over the floor. You can potentially run in circles to stay in the super boost zone longer and charge more. It also works on the East or West sides of SC OOB at multiple locations, when climbing to the South, as the camera gets at this angle too at some points during the ascent.
Forcing a super boost camera angle[]
Difficulty: ![]() This is an advanced super boost technique that is much harder to do and makes it very hard to maintain the camera position.
This is an advanced super boost technique that is much harder to do and makes it very hard to maintain the camera position.
- In snow level OOB there is a huge cliff on the East side (watch any glitched speedrun to see how to get there, speedrunners usually dive or boost from the top of this cliff). When diving very close to this cliff (cliff on your back), the camera angle will be vertical. You can exploit it to do a super boost but it requires to flick the camera stick very fast on a controller (strictly right and left) to keep the camera angle when you dropshoot, as you get away from the cliff. Release the camera stick and stop forcing it to the ground before getting away from the cliff, or the camera will rise by itself suddenly. This camera angle is hard to maintain, and you should boost if it's about to go off completely. This should work against any vertical cliff, such as the ones from the plateaus of UG or in CS OOB. Like shown in the video below, it is a good idea to move towards the camera while dropshooting on top of the cliff, for a split of a second, and then dive with the correct camera angle. Or you could simply let yourself drop close to the cliff and then get into a dive.
Note it might be easier to maintain the camera to the ground with lower FPS (PS3 easier), though still possible with over 100 FPS on PC
![]() It might be possible to stay close to the cliff to keep charging with a forced camera angle (how? where? Not sure if possible)
It might be possible to stay close to the cliff to keep charging with a forced camera angle (how? where? Not sure if possible)
- You can sometimes use walls and objects to force a camera to the ground, and then dropshoot away while trying to keep the camera angle. This usually works while having an object close to the back of the wayfarer (and the camera facing in the same direction as your character). To force the camera down with an object behind you, it can help to jump a bit or wiggle the camera to the sides, while still pushing it. Some objects work better than others, especially when they aren't too big in height, and the camera can get stuck on top of them, to get pushed to the ground even more (see Chapter Select example below, or try it with the two big lanterns at the end of UG level, ...). Don't forget to flick the camera stick right and left when dropshooting afterward or the camera will quickly level out.
Trivia[]
. . .
Quotes[]
. . .
See also[]
Fancy Flying is when you control the character and camera together in order to gather energy with a dive and release it in the form of a boost, to gain lots of height, distance and/or speed.
Refer to the main article for general information and tips.
With Companion: Tandem Flying. Solo: Dive Boost (DB), Dropshoot (DS), Charge Boost (CB)
Expert Mode introduction article to everything beyond the most basic gameplay.
See also: Glitches, Out of Bounds (OOB), Tricks, Challenges, Category:Expert Mode Glossary.
Robins Guide for Newcomers . 26 Minutes, full of tips, tricks, dos and don'ts.
References[]
. . .