Seshatienosco (talk | contribs) m (Added/Removed Words - Created New Section - "Replacing Images" with directions) |
m (slight adjustments) Tag: Visual edit |
||
| Line 53: | Line 53: | ||
=== Creating a New Article === |
=== Creating a New Article === |
||
| + | To create a new article, |
||
| ⚫ | |||
| + | [[File:KebabMenu.png|left|frameless|100x100px]] |
||
| + | |||
| + | * click the page icon in the menu, shown on the left |
||
| + | * scroll down at the front page to the "Wiki Information"-box, type in the title of the article and press "create article". |
||
| ⚫ | |||
| + | |||
| + | '''File system / categories''' |
||
| + | |||
* Help others to find your article: put it in one or more categories |
* Help others to find your article: put it in one or more categories |
||
*Everything needs a category, so it can be found again. |
*Everything needs a category, so it can be found again. |
||
| Line 108: | Line 116: | ||
====Using Templates/Icons==== |
====Using Templates/Icons==== |
||
| + | <u>The easiest way to implement a template is the copy - paste - change-method.</u> In visual editor, simply copy an existing template from an article (in editing mode) to the article where you want to add it. Click it to change the text/image. |
||
| − | Placing certain icons or templates will auto assign categories to the article they are in - links and examples can be found below: |
||
| + | Icons have a list of articles they are used on, on their page: "file usage". |
||
| ⚫ | |||
| + | |||
| + | <u>These templates automatically add a category to the article, they are used on:</u> |
||
| + | |||
| ⚫ | |||
*[[Template:Investigationsmall|Investigation Small]]: Small investigation icon. |
*[[Template:Investigationsmall|Investigation Small]]: Small investigation icon. |
||
*[[Template:Investigation-box|Investigation Box]]: Shows a box with bold summary and expands to show additional info. |
*[[Template:Investigation-box|Investigation Box]]: Shows a box with bold summary and expands to show additional info. |
||
*[[Template:Random Box Investigation|Random Box Investigation]]: Random investigation notes are displayed upon page loading, similar to Tip Template. |
*[[Template:Random Box Investigation|Random Box Investigation]]: Random investigation notes are displayed upon page loading, similar to Tip Template. |
||
| + | *(Spotlight submission adds a category to the image) |
||
| − | + | The page "[[Under Investigation]]" dynamically pulls the articles that are tagged with the above templates/categories, so viewers can see the full list on one page that changes as these templates/icons are added or removed. |
|
| − | |||
===Adding Images=== |
===Adding Images=== |
||
Revision as of 15:35, 11 November 2021
| This article may need cleanup to meet quality standards.
Please help improve this if you can. The Discussion page may contain suggestions. |
Please help improve this if you can. The Discussion page may contain suggestions.
How to Contribute - Style Guide
Welcome Editors!
The people working on this Wiki are organizing edits and discussing the "how to do things" at this Discord-server. Come to us and be part of the team! Any help is welcome.
Journey is an old game and most things are known, but maybe not mentioned on this Wiki yet. For general talks about Journey, consider joining the Community Discord.
If you know you are going to just fix some typos, grammar or make text more understandable, just go ahead. Just keep in mind, that mass edits like changing a name or term on all articles without consulting the Wiki-team might cause extra work for all of us.
For general style guidance, start by reading the Fandom Style Guide.
It's easy to assume things in Journey, please make sure that you can proof/verify the information you are putting on this Wiki.
What's Needed?
- Spellchecking, making existing text more understandable..
- Under Investigation: Be a Journey Detective and help discovering, verifying, and documenting Glitches.
- Many articles got created to show that "this exists", but specific explanation or videos are missing. Feel free to share your knowledge!
"Got an Idea. Don’t Know How to Start - Is This Already Covered or In Progress?"
- Submit your thoughts and questions here: Community_portal
- Talk to us directly on the Discord-server.
- Contact the Guardian of this wiki, leave a comment here: UserProfile:ravingmadness, since some pages are in the making but not linked yet. Just to avoid double work.
"Don't Know How to Edit or Dare To?"
- This article will be expanded to help with basic editing.
- The visual editor makes adding images and formatting text easy.
- You can easily switch between the visual editor and text editor by clicking the pen on the top-right corner while working on an article (save before switching to the other).
Nothing can go wrong, even if you delete the whole text, it can be reverted. Also, the admins see the recent changes and can check if anything is missing (like categories), putting a picture to a better place etc. Just do it! If you got something to say, hit the edit button and write your text, then save changes! :)
For testing the format and such you can put the article into the Category:Dump articles.
Please consider to deliberate with UserProfile:ravingmadness if you are going to do mass edits.
Feel free to add information to already existing articles. The talk page of an article can be used to discuss certain glitches.
You got a good tutorial video? Or even a list of them? --> categorize them, by putting the links into the according article. This way we will also get a tutorial video database...
Verification Needed
It may happen, that you write something that others didn’t know about. You might get asked to share where you got your information from, contribute an image or video. We want to make sure that the information given on this Wiki is verified by several people.
A bug might occur once or twice, but it doesn’t mean it happens every time, maybe a little thing is missing or not possible on another device.
If you are not too sure about something, but still want to write about it, get in contact with the Wiki team or just:
- Create the article, with the Template "Stub" and a fitting category.
- Create the talk page to that article.
- Link it on the main article with some basic info, mention that it's still investigated.
Creating a New Article
To create a new article,
- click the page icon in the menu, shown on the left
- scroll down at the front page to the "Wiki Information"-box, type in the title of the article and press "create article".
- More information can be found here: Fandom: Creating a Page.
File system / categories
- Help others to find your article: put it in one or more categories
- Everything needs a category, so it can be found again.
- Categories could be seen like folders in a file system.
- Please search and add the right Category for your article in the Category Tree, see below.
- Check first if the thing you want to describe is already in the Wiki.
- Try some keywords and search or go through a certain category that you think could match your article
- Again, come to our Discord Server!
- Spoiler Tag?
- If you think something is a spoiler or you want to give people the chance to choose if they want to see this, use the spoiler template. Better to use it too often than too little
Main Guidelines for Editing on the Journey Wiki
- Keep newcomers safe from advanced stuff (Glitch, OOB, Fancyflying, if not directly related to that article, also FPJ, Zen Jump), they may like to find out by themselves, exploring Journey or the Wiki itself.
- Guide users gently to advanced stuff. Provide links, so they have the choice to see it (put a warning or spoiler tag there).
- Keep up the Journey spirit of “There are no mean companions”, like “Do not lead first runs OOB”.
- Help people to get to know how others travel and communicate. Saying “help them to be a good companion” is not appropriate, because everyone sees it differently.
- There is a Journey etiquette to which many people stick to make the Journey for others enjoyable. We will not force people to stick to it, but it could be helpful for those who want to know more about "how to travel with a companion". The variations are endless.
- Common behaviors should be expanded by editors with their own behaviors they show to indicate certain things (break, happy, want to travel alone, what are we doing?, I don’t want that..). Other Journeyers can pick them up or at least have better guesses on what the other might “say”.
- There is a Journey etiquette to which many people stick to make the Journey for others enjoyable. We will not force people to stick to it, but it could be helpful for those who want to know more about "how to travel with a companion". The variations are endless.
- Since most of the knowledge about Glitches/OOB/Flying comes from long-term players, we would like to honor them by keeping the terms they used, redirecting other not so common names.
- Although, this could lead to discussions about for example “why is Zimcloak named after a player?”, because no one can be sure if there wasn’t another player finding it first.
- Alternative Names: Generally, alternative names do not require a sub-header.
- Whether to use bullet points depends on how many alternative names there are.
- Three and fewer look better in a sentence (e.g. "White Cloak, also known as White Robe..." or "...it is also called Chinese Lantern or Mushroom."
- For longer lists bullet points are recommended in which case they should be included in the introduction rather than separately. // this has been discussed on 16 June 2020.
Adding a Template
Depending on your preference, it may be easier to work with one or both types of editors - Source or Visual. However, it is recommended to use the Source Editor when possible.
- For a general guide on how to, please visit the Fandom's Guide to Templates.
- Journey Wiki Design Templates and Icons lists icons, disclaimers, and Wiki Navboxes templates that are specific to this wiki.
- General Category:Templates should have full list of templates.
Commonly used templates to create content for the wiki can be found below:
- Infoboxes: Creates a box with quick summary of specific details.
- Notices: A custom notice will appear (e.g. expert articles, citation needed, spoilers).
- Video with Caption: Generates an embedded video object with specified captions.
- Quotes:
- Simple Quote: Best for short inline text.
- Complex Quote for "Quotes section" at the bottom of articles.
Note: If you're using the Source Editor, you will not be able to press the Insert button. That button is only available in the "Visual Editor" mode.
Using Templates/Icons
The easiest way to implement a template is the copy - paste - change-method. In visual editor, simply copy an existing template from an article (in editing mode) to the article where you want to add it. Click it to change the text/image.
Icons have a list of articles they are used on, on their page: "file usage".
These templates automatically add a category to the article, they are used on:
- Investigation: Displays large investigation icon.
- Investigation Small: Small investigation icon.
- Investigation Box: Shows a box with bold summary and expands to show additional info.
- Random Box Investigation: Random investigation notes are displayed upon page loading, similar to Tip Template.
- (Spotlight submission adds a category to the image)
The page "Under Investigation" dynamically pulls the articles that are tagged with the above templates/categories, so viewers can see the full list on one page that changes as these templates/icons are added or removed.
Adding Images
Before Adding Images
Please note that any and all images added to this wiki live in a centralized location and need to be identified and sorted by categories. For example, even if you are in a Talk page for an article, the image uploaded through the interface there WILL need to have categories added to them.
Make sure to:
- Check the Category Tree to see if the image (or similar one) already exists
- Look through them to see which categories your image may be under
- Use existing file nomenclature (if possible)
- You will not be able to rename or delete files once they are uploaded (but admins can do this)
- Feel free to reach out to us through discord
Uploading Images

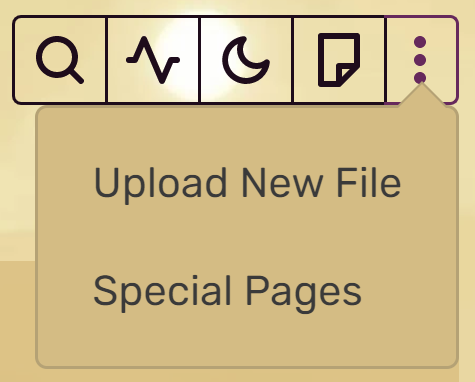
Main Menu for File Upload
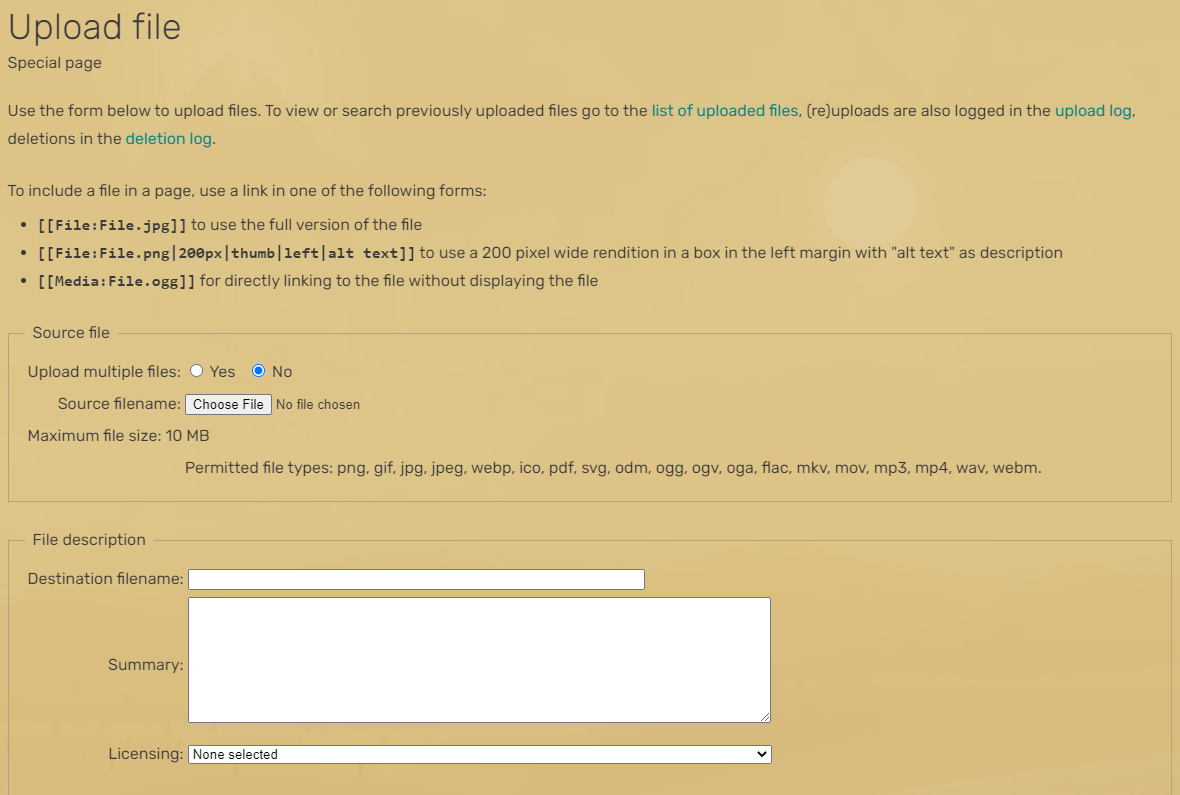
Interface to Upload Files
- At the main page at the top right corner, there's a menu with three dots.
- Click the dots and it will show option --> Upload New File. You will be led to the interface to upload files.
- Under the "File description" section:
- Destination filename: Input the name the file will show as on the wiki
- Summary: Describe the image, input categories (please see Category Tree section in this article)
- Choose one, better 2 or even 3 categories for your image. This helps to sort images and find them again or for users to just browse the category that they are interested in.
- One category should be a subcategory of either Journey or Expert Mode, the second category should be chosen from the Media-branch in the category tree.
- Example text is below for use in the summary field (categories should be sorted in alphabetical order):
- Thank you <your name, name of person who made the image> for this image
- This image shows <short description> (optional)
- [[Category:BB - Images)]]
- [[Category:Broken Bridge (BB)]]
- {{Copyright game}} This is the correct copyright-template for screenshots of the game.
- FYI: After you save, the categories will NOT show up in the viewer under the summary section. You will see them above the image file name as hyperlinks at the very top.
- Example text is below for use in the summary field (categories should be sorted in alphabetical order):
- License: Choose the best fitting license, (e.g. if it's a screenshot, use "This is from the game or its official website")
- Click the File Upload button once you're finished.
Note: It might be easier to add categories after uploading the image first. In that case, after your file uploads, click edit in the summary section. Begin typing in the first letters of the category and the names will populate automatically.
Replacing Images
If you need to upload a new version of the image or replace the image with an updated one it should be completed by:
- Making sure you find the image's file page on the Wiki
- Using the "Upload a new version of this file" link that is located under the "File history" section
- Do not change the "Destionation File Name" that is displayed on the page
Create a Gallery for Pictures and GIFs
If you have to show several pictures together, you might want to consider the use of a gallery for a better presentation. See an example below:
First gallery:
| |
| Spoilers end here. | |

To create a nice-looking gallery, you can copy-paste the following code in text editor:
<gallery mode="packed-overlay" heights="200">
File:File name|Text caption for the image
File:Other file name|Text caption for the image
</gallery>
You can edit the file-names in text editor and put as many pictures/GIFs as you wish here. You can also change the text captions displayed on the pictures (if you want some), edit the height of the images in pixels (200px here), or change the gallery mode.
However, once the code pasted in text editor it might be easier to use the visual editor after (Try to use a bit of both):
Click the Gallery line, then "edit". Here you can easily search for images with keywords and add or erase them from your gallery. In the option tabs, you can choose a specified image height, enable to show filenames, or change the displayed gallery type.
Concerning the Gallery types, If you want to change it, here are the different options in order to get an idea of what will suit you best:
Traditionnal:
| |
| Spoilers end here. | |


Category Tree
Which category should I add to my article or image?


How to open the whole category tree
Every page needs at least one category. Depending on workload the admins can take care of adding categories to your edits. If its about a bunch of pictures that you want to upload, its helpful to coordinate it first with an admin or the wiki crew.
You can lookup this: https://journey.gamepedia.com/Special:CategoryTree and see which category you find fitting for your image or article. Note: To see the full tree you need to start with the uppest Category:Journey Wiki. See image.
The wiki has two big branches in this tree:
- Journey (to give a clean look and only basic information for newcomers)
- Expert Mode (advanced flying, OOB and Glitches, “spoiler things”). So everything just slightly revealing should be put somewhere in the tree under subcategories of Expert Mode.
This wiki has a media branch too, where only images and videos go. Its a safety net so no image gets lost, if the first category isnt very descriptive.
Date Format
Year-Month-Day (yyyy-mm-dd)
On some wiki pages you will find dates in "dd-mm-yyyy", "mm-dd-yyyy", or "yyyy-dd-mm" formats. Please change them to the format mentioned above for a better coherence!
Mentioning Buttons and Keys (Movement, Options, Menu, etc.)
Example: Press X to fly.
The game is played with:
- Controllers for PS3 and PS4
- XBOX controller or other brands
- Keyboard / keyboard and mouse
Warning: Work In Progress
Some buttons on various wiki pages are referred to as "start", "select" or other.
These button names should be changed to "screen saver button" or "main menu button", considering that the controllers used on different devices have different button names.
Using "screen saver" and "main menu button" instead will make sense to every platforms on which you play Journey.
The same goes for the use of "left stick forward" for example, as there isn't any stick if played with a keyboard. You could use "move forward" instead, or anything that would make sense on all platforms.
Please be careful when renaming the correct buttons, as the X button for example could mean X on PS controller BUT Y on XBOX controller, depending on the platform for which the article was originally written for.
![]() Overview about Controls, buttons used on each device on standard setting.
Overview about Controls, buttons used on each device on standard setting.