 |
Navigation help for Level-articles: Levels
Remember that by reading further then the Overview you might get exposed to spoilers! The Wiki intends to describe every little detail and background knowledge (as soon as available and verified). Detailed help for Trophies, Glyphs and Symbols are given under that headline. In the Sections part, there will be just hints. |
Remember that by reading further then the Overview you might get exposed to spoilers! The Wiki intends to describe every little detail and background knowledge (as soon as available and verified).
Detailed help for Trophies, Glyphs and Symbols are given under that headline. In the Sections part, there will be just hints.
| Snow | |
|---|---|
| |
| Details | |
Level#/Abrv. |
7, Snow |
| 0 | |
| 2 | |
Sections |
Windy Valley Heating room War Machine Valley Seaweed Valley Windy Balcony Final Climb |
Keywords |
cold and dangerous, need.. to.. cuddle.. |
Snow is the level were you freeze, while trying to not give up on your Journey. Some say its the toughest level.
Alternative Names:[]
Mountain, Snowy Fields, Mountain Pass
Overview[]
As always its possible to finish the level, by simply following the path (in this level its serpentines, that lead up the mountain).
At some points you will need to look around to find your way, eventually use your Chirp to unfreeze Banners.
At some sections, its easy to get disorientated. Since you are freezing and walking slow, make sure you are walking in the right direction, you do not want to "crawl" all the way back. Finding your way becomes easier after some playthroughs.
* freezing, makes you walk slower then in other levels. A Red Robes Scarf lose its charge over a short amount of time
All those create a strong feeling of "struggle". | |
| Spoilers end here. | |
In the last section of the level - a wide, steep area with some Gravestones - you will become even slower and lose the rest of your Scarf.
This is the last "trial", the moutain is waiting...
| As in every level, the Mountain is calling. The wind might even help, when walking to the sides with it.
The general aim though, is forward. At some point the storm will stop, everything will become very white. In the end you will be so slow, that it seems you are not able to walk anymore. Just walk forward until you fall down and receive another vision. | |
| Spoilers end here. | |
Sections[]

The first War Machine in Snow.
The whole level is a path in serpentines, but still towards the mountain. The first parts (snow canyon, windy area, climbing to Lantern room) make the inner circle and the second part (patrol field, narrow passage/seaweed valley, playground) form the outer circle.
Start area[]
Alternative Names: Thawing Room, Exit of Tower
On entering the level, the game shows you a Carpet dropping out of the sky and others will drop too during the level. The view up also shows a broken bridge with a Banner. Later in the level you will cross this bridge.
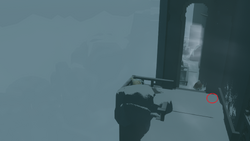
After leaving the bridge-pillars behind, you will get a "warning" on what awaits you in this level: again War Machines. The camera will angle up and show a War Machine attacking a Carpet, which then falls to ground, only its tails sticking out of the snow.
After passing the big rock, the path takes a slight left turn, you will enter the:
Windy Valley[]


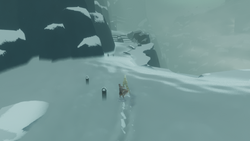
Windy Valley: Two wayfarers hiding from the wind.
As the name implies, very windy, in fact so much that you will be blown back. Some players instinctively hide behind the Tombstones, which is the only way to avoid being blown back.
Sometimes the stones are also called "whistling stones", since the wind really howls here. The theory is that the hole on top makes an extra sound, when the wind passes through it.
The wind will blow in intervals, when it stops the player(s) need to quickly run/fly to another Tombstone before the wind starts again. Even when still rather far away from the next stone, try to get straight behind it. The "protective distance" behind the stones is rather long. Sometimes it seems that just being fast enough or passing in a certain way makes the wind appear later/not at that stone.
Different routes can be used, its totally not needed to wait behind every Tombstone. Its fun to try out which route might be the fastest. Some players seem to be "trained" by this area and hide behind every Tombstone in the level. Though, hiding at Tombstones is only needed in the Windy Valley.

Path to Heater room, First part, towards heater room. First carpet house at the left.
At the end you pass through a strait in the rocks (that one probably causes the wind blowing so strong in the valley).

Path to Heater room, Second part.To the right side is that "dead end". At the end of the path in this picture, to the left side is the Heater Room.
Path to Heater room, first part: You go up a path, passing some War Machine parts. In the first to the left is a freezing Carpet, that can be freed with a Chirp (see also Snow #Trivia). The Carpet will fly a bit around and then hide in the next part to the right. It will not leave this place.
Path to Heater room, second part: The path seems to be a dead end at first. Though the camera movement will strongly hint to go to the left side. Another War Machine will patrol in the air here too, it flies towards heater room, above the cloth bridge and over a wall to the Patrol Fields.
If one is curious, they will walk forward instead of left and drop down to a "safety ledge" (see image "second part" and Snow#Connection and Companion hints).
The path leads up some stairs and ends at the Heater Room to the left and the Cloth Bridge to the right.
As White Robe or with a Companion: The stairs part can be almost skipped, by flying over it (the two big rocks in the middle).
Heater room[]


Enjoying the warmth from the heater.
Alternative Names: Lamp-Lit Rest Area, Heater.
Before the path takes a right turn to the cloth birdge, the camera will hint to the left where the Heater Room is.
In the middle of the room is the heater. Through activating the stones around it - either by Chirp or touch - the machinery will light up and emit a glow and provide a warm zone.
Like the starting area it will unfreeze the Wayfarer's Scarf.
Additionally, when the heater is activated a group of flyers hiding on the second story will come down and fly around the heater. Chirping to these flyers will get them to boost you up and into the top room where you can find a hidden Glyph/History Wall.
Once a player left the Heater Room, it will turn off and can not be activated again. Chirping at the Flyers one last time before leaving the room and flying forward, is a nice trick to pass a small distance quicker.
Cloth Bridge[]


The cloth bridge, after the Heater Room
Upon getting close to the bridge, the game sometimes shows the hint to Chirp[1]. This will unfreeze the cloth shortly and it will move. Sometimes a "trust jump" onto the Banner is needed. As long as the player(s) chirp and fly forward, its easy to cross it.
The area below is the level start area.
Sometimes a player falls down, then they have to walk all the way through the wind valley and up to the Heater Room (see Connection and Companion hints)
![]() Wind Valley has less wind, if going it for the second time. (yes, but maybe i am halluzinating .) Ravingmadness (talk) 18:38, 30 July 2020 (UTC)). Cloth bridge pointing up or down? See Talk:Snow.
Wind Valley has less wind, if going it for the second time. (yes, but maybe i am halluzinating .) Ravingmadness (talk) 18:38, 30 July 2020 (UTC)). Cloth bridge pointing up or down? See Talk:Snow.
Patrol Fields / War Machine Valley[]


First Patrol Field: Path to the Ice Cave.

Second Patrol Field: A WR sneaking past the 2nd WM
Alternative Names: War Machine Valley
After passing the Cloth Bridge you enter a huge section. This area could be divided into 4 parts:
- first field, after the entrance to the end of the first group of WM parts (ends with a WM head)
- Ice Cave path to the left (the last Ancient Glyph there). The image to the left shows one of several paths to the Ice Cave
- section in between where you do not get attacked. You bypass this section, when visiting the Ice Cave
- second field, from the single Tombstone in the middle/the WM part after it (where the huge light appears) to the gateway.
Across the whole Patrol Fields are some things, that can be used to orientate ("after those three parts, look left and head to the tombstone" etc.):
- War Machine parts, those are used to hide from the War Machines (not all of them have to be used).
- Some Tombstones, The wind does not blow you back, like in the Windy Valley; no need to hide behind them.
- Cloth sticking out of the snow. Most of them seem to be dead/crashed Carpets.
There are many ways to avoid getting attacked, get to know when the Machines appear, where they patrol etc. Further hints are at Patrol Field, stay save.
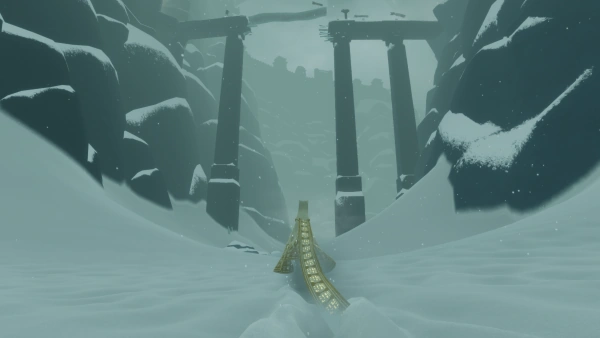
Seaweed Valley[]


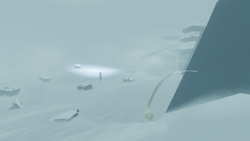
Start of the Seaweed Valley, looking back into the second Patrol Field.
Alternative Names: Birdseye Canyon, Frozen Corridor
is right after the area with the War Machines, a long and narrow pathway leading up the mountain side. The camera angle changes to a view from above and the music will change to a more friendly jingle.
(Dead) Whale Courtyard[]

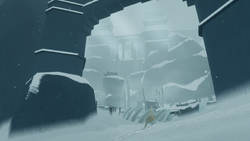
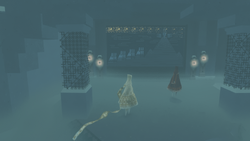
Entering the Whale Courtyard / Playground.
Alternative Names: Playground, Courtyard of Frosty Ribbons, Frozen Fronds of Scarfs At the end of this pathway is a small courtyard with lots of frozen banners, some are resembling the seaweed from the Underground_(UG).
About the shorter banners on the ground, between the War Machine parts: | |
| This can be best discovered/shown on top of that area, looking down to it.
The banners grow out of a crashed War Machine, the head part looks very much like the head of a Whale. Implying that Whales were in the War Machines, more information on that article. | |
| Spoilers end here. | |
Some players like to unfreeze the little Banners with chirps and walk through the machine parts. To leave the area, one has to climb the Kelp at the end, this is also easier when unfreezing them. Another path follows, it gets narrower at the end and before reaching a little court, the light dims down (maybe because the light can not shine in there, the rocks blocking). After leaving the court, the camera view changes and shows the Windy Balcony. At this point, its possible to release a huge chirp bubble.
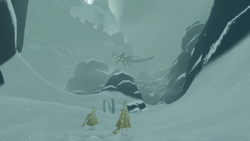
Windy Balcony[]

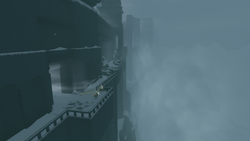
Start of the Windy Balcony. Two WRs struggling against the wind.


Entrance to the Death March.
- Right after the outrance, just walk forward against the wind at the first part. Then adjust to the wind intervals, better start walking half a second too early then too late ;) The places with no snow on them, mark save-to-stay-places.
- Stairs. It seems that timing is here even more crucial to make it up without being pushed back. Once you are up, you can stand either on the platform to the right or a small place, close to the wall at the left.
- without a safety net. After the stairs waits another balcony-part, but this time the railing that keeps you from falling off is broken. Its easy to fall off here, but also easy to go up again.
See also Snow#Tips and Tricks.
When looking towards the gateway to the last section, lightning and loud thunder give an uncomfortable feeling.
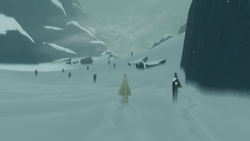
Death March[]


The wind blowing away pieces of scarf
Alternative Names: Final Climb


Two Wayfarers (one is naked), at the end of the Death March.
A steep plain, leading to the mountain. The music and the wind blowing make this part rather intense, although it is rather empty; besides some Gravestones and a War Machine patrolling high up.
Differenent "stages" on your way up to the mountain:
- Storm pushing the player to the sides, in regular intervals. Thrilling music plays, Chirps are barely visible and have a very faint sound. The wind will blow away all the Scarf from the player.
- Storm and music stop, the scenery becomes more bright. The Wayfarer walks slower.
- The mountain starts to vanish in the fog. Its the start of the dying / passing out process. The Wayfarer walks slower and slower until they fall down.
Tips and Tricks[]


Circle marks a place to have a nice view, the safety ledge is also seeable from there.Arrow is towards Heater Room.
 Connection and Companion hints[]
General hints on connection and specifically for this level can be found here: To connect or to disconnect!

Also a save place to stand and to impress Companions.
General[]
Wind Valley: It's also possible to stand in front of the stone and not get blown away. Hiding in front of the stone gives a little extra distance.
Patrol Field, stay save[]
In general, many players use the "hugging the left or right walls of the patrol fields" strategy. Most strategies will need some trying out, gathering experience about the places where the Machines patrol or appear.
Possible routes:
First patrol field:
- Directly head to the left, towards the Ice Cave.
- Hug the right side wall. Carefully walk forward, once the first War Machine flew over the ground, walk further.
- Walk forward, do not hesitate and hide in the first War Machine part. Immediately when the light passed, walk forward to the next one. Normally the WM flies over the third part, so you can just walk through the second one. Once this is passed, the WM will raise up and stop focussing the WM parts on the ground.
Second patrol field:
- From the ice cave, go further and then hug the cliff walls to the left until you reach the end of the patrol field. Stay close to walls and cliffs - the war machines can get close. You may still get attacked, but the risk is lessened. Take a look into the level from time to time, to see if the WM is coming towards your position. With a Companion: cuddle when the wind is blowing and fly/jump forward when its not blowing, much quicker then crawling foward. Cuddling and chirping will warm you and fill a Red Robes scarf, both can fly and chirp louder.
- If going the normal/middle route: Right after hiding from the light in the WM part, walk rather straight forward. The timing is important, do not jump or fly and start walking right after the light passed the War Machine part. If you got the timing right, the light will come close to you (from left to right side), but will not reach you. Depending on timing you might have to stop walking for a second, to not get too far to the point where the War Machine passes. See video below:


Safety ledge at the Windy Balcony. Arrow marks the point where you come up again.
About jumping down / falling down[]


No safety ledge at the cloth bridge. Arrow points to the entrance building below.
At certain places in the level you can fall/drop down. Some Companions might go down there to satisfy their curiosity.
- Before the Heater Room: At the point where the path takes a left turn, one can walk a bit forward and have a look down. Below is the first area of the level, with the big stone, where you get to see the first War Machine in the air. Below is a "safety ledge" where you can walk towards the start of the level, to have a look. People might willingly jump down here too, but if they recognise its just they start area of the level, they will walk back and use the stairs to get back up to the normal path.
- Around the Bridge: Not everyone recognises, that the area below is the entrance of the level. If you do not follow them down here, a disconnect by distance might happen (or connecting to another Companion). Since you are down there already, both could have a look through the gate in the thawining room/start building (get so see the Tower resemblance).
Why it pays off to follow them down: alone it will take them much longer to get back where they dropped off, with chirping at each other and cuddling to warm up both can rather quick come back to the bridge.
Windy Balcony: at the end where the railing is missing, one can fall down too. There is another safety ledge, a crashed War Machine with little Banners sticking out, brings you rather quickly up again, if using fly and chirp to unfreeze them.
War Machines, not doing their normal thing[]
Those things can happen on all versions (maybe more/less often, depending on version).
Often War Machines behave unexpectedly, due to being offsync, but there are probably other reasons too.
It might happen that
- you see your Companion being attacked by an invisible War Machine (WM)
- the Companion shows the attacked animation, but no WM is visible. When they are already laying on the ground, then the WM appears and attacks. See video:
Several different things like that were reported over time, even a War Machine that focused the Companion and then attacked the other player.
Ice Cave visit from other side[]
Something that can give a nice experience, is to show the Ice Cave Glyph, from a not too obvious path. If the Companion
- did not find the Glyph ever, it will be just "they way to the Glyph" on this Journey. On their next Journey they might find out about the easier path.
- found the Glyph through the front entrance, they will have a suprise right away.
Beware: some Companions insist on going "forward", which means they go to the front entrance of the cave and end up in the first Patrol Field. (It can be fun to see when they figure it). If you leave them alone and trigger the second War Machine, you will probably get disconnected. A good place to wait for each other is the Seaweed Valley.
See Snow#Glyphs.
Trophies, Glyphs, Symbols[]
Trophy[]
Two ancient Glyphs are found on this level. There are no collectible Symbols on this level, and no trophies specific to it, although some game trophies could be unlocked in Snow in the first Journey.

Uncover all 10 Ancient Glyphs.
Assuming you've found and activated all ancient glyphs on preceding levels, activating the last two glyphs (locations are described below) will grant you this Trophy.
Glyphs[]


Heater Room Glyph.

Ice Cave Glyph.
Two glyphs can be found on this level:
- In the Lantern/Heating room, which is just before crossing the bridge. In a hidden area above the heater is the Glyph (Flyers will help you to get there). It can happen that it does not activate,
- Cause? Activating it accidently from below, not seeing the activation and then going up? When with a Companion, does it happen that it does not activate for both?[2]
- On the left side of the patrol field, in an Icy Cave. There are several ways to get to the cave:
- See gallery below: The most direct way, after crossing the Banner bridge and entering the Patrol Field. Stick to the left side and just walk along the wall.
- After the first War Machine: In the images you can see a Tombstone. This can be used to find the way up, At the end of the first group of War Machine parts, simply look to the left and walk towards the Tombstone.
- From behind: Of course you can just walk towards the cave from the start, not entering it and follow the wall that points to the level, to find the exit of the cave. The more exciting route:
Walk the middle way, pass the first group of War Machine parts and walk further. Around were the second group of War Machine part starts, to the left side are some Carpet tails sticking out. Behind those is a hill to climb. Walk straight up, rather to the left. Beware to not slide down to the place were you drop normally, after leaving the cave. Stay up, hug that wall, there is a little rock-ledge on which you can walk towards the cave exit.
Symbols[]
There are no Symbols in this level.
Sights[]


Entrance to Heater Room. With help from Flyers its possible to easy reach that circle.
- Heater Room: see image. From inside the room, chirp at the Flyers and fly outside and up on the pillar. Use the flyer boost and the warmth from the Heater Room, to reach the place.
- Seaweed Valley: Frozen Whale in the playground. At the first group of small banners, sticking out: You can play "push the banners into the ground", its possible to make the all almost vanish in the snow. Players also like to slide around at them and a FP can make you float "funny" on them. To the right side in the valley is a wall with some windows. If you look through them for some seconds, a War Machine will fly by. Of course it can happen that the Machine gets triggered before (going close to the windows). If the WM "loops" --> appears more then once, if you just wait long enough.
- Patrol Fields: Black Carpets circling above the patrol field, have a look up to the sky. After going through the gateway at the end of the fields, just turn around and have a look back. You can watch the War Machine patrol and enjoy the view. When trying to go forward to the "view from above path", the camera will be still focussing on the field, for some meters (just keep on walking).
Trivia[]
- Windy Valley: the wind does not blow you back at the first two stones, its possible to (almost) reach the third stone, by simply keep on walking. You can also stand in the wind between second and third stone, though if you fly you still get blown back.
- Patrol Fields: The first WM in Snow attacks only once and the second only twice.
About the Death March[]
| "Has anyone ever been the first to fall on the last level?"
"It's programmed so your companion will appear to fall before you" 26.04.2020 Zerathine The proof for this is that you never see yourself fall first. | |
| Spoilers end here. | |
Video "possessed Wayfarer"[]
in which one Wayfarer slogs along like it should be at the Death March, while the other suddenly starts walking quickly.
The cause of this is unknown to the Wiki.
Quotes[]
| “ | On my first run I didn't expect to die.
What left a far greater impression on me than the death march was the patience of my companion who waited until I finally managed to climb the stairs after failing at least 20 times |
„ |
| ~ BlueShine941 |
| “ | I was like...”is that it”? All that effort to just meet the end in the snow...am I a joke to you TGC?
Then when I realised there’s more that meets the eye I became an emotional wreck lmao. |
„ |
| ~ KokiriDoll |
| “ | Oh, I was disappointed!
Because it was a weird moment when I couldn't influence the outcome and change something, I wanted to have entertainment, but I just died and that's all... Only after that I comprehended the whole philosophical component of the game and realized it as a specific entire art. |
„ |
| ~ Knock-knock-joke |
| “ | The only two good things about this level: going out of bounds and going to paradise. | „ |
| ~ Naharie |
| “ | Wayfarer dies of exhaustion for walking, wearing a heavy robe. | „ |
| ~ DJThanos, about the Death March |
[]
2 Broken Bridge (BB)
3 Pink Desert (PD)
4 Sunken City (SC)
5 Underground (UG)
6 Tower
7 Snow
8 Paradise
9 Credits
Category:Levels
2 Broken Bridge (BB)
3 Pink Desert (PD)
4 Sunken City (SC)
5 Underground (UG)
6 Tower
7 Snow
8 Paradise
9 Credits
Category:Levels
Recommended How to play guide for Journey • Chirp/Scarf • Tandem Flying • Dusting / to dust/Common Behaviors • Companions Met Along the Way (CMATW)
Frequently Asked Questions • PC Version FAQ •
2 Broken Bridge (BB)
3 Pink Desert (PD)
4 Sunken City (SC)
5 Underground (UG)
6 Tower
7 Snow
8 Paradise
9 Credits
Category:Levels
2 Broken Bridge (BB)
3 Pink Desert (PD)
4 Sunken City (SC)
5 Underground (UG)
6 Tower
7 Snow
8 Paradise
9 Credits
Category:Levels
Recommended How to play guide for Journey • Chirp/Scarf • Tandem Flying • Dusting / to dust/Common Behaviors • Companions Met Along the Way (CMATW)
Frequently Asked Questions • PC Version FAQ •
References[]