 |
This article falls under the category Expert Mode.
To avoid frustration or confusion, we recommend getting familiar with the Expert Mode first. Further more, in-depth knowledge of Gameplay Basics is assumed at Expert Mode articles.
| ||||||
| This article may need cleanup to meet quality standards.
Please help improve this if you can. The Discussion page may contain suggestions. |
Please help improve this if you can. The Discussion page may contain suggestions.
| Snow (OOB) | |
|---|---|
| |
| Details | |
Level |
Snow |
| Many places to get lost, frozen or even stuck (depending on where you go). | |
Platform |
|
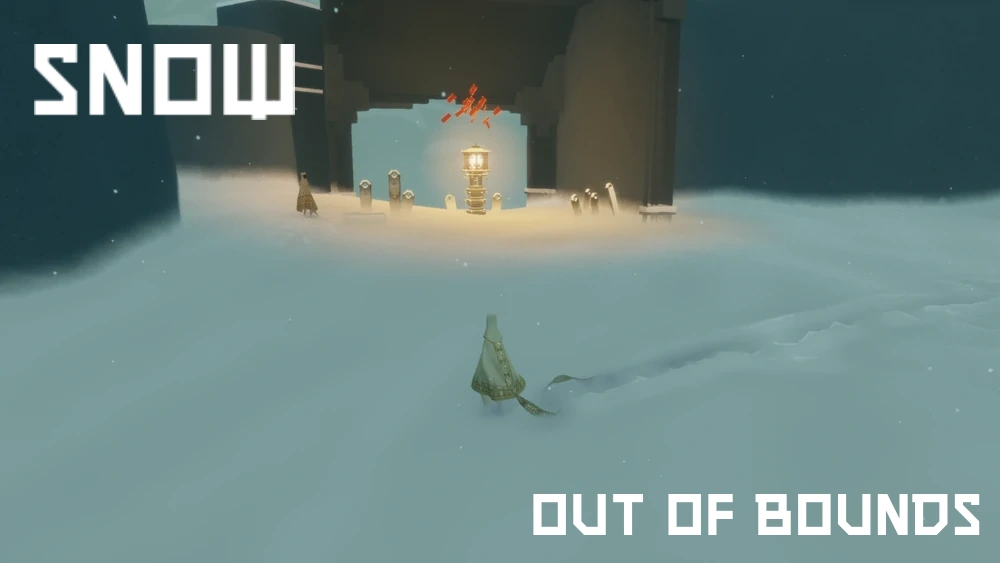
This article explores the out-of-bounds (OOB) areas of the Snow level. For general information about the level, please refer to the Snow article.
Overview[]
![]() When using a controller, it should be possible to enter at start of the level or at the ice cave.
When using a controller, it should be possible to enter at start of the level or at the ice cave.
Some say the snow-level is tough because you have to walk slow and no one really likes the storm. So the solution is: take the shortcut! Skipping from start to the death walk through the OOB area.
The Snow OOB is not only used to quickly skip the level, there are many things to see and find in there too.
How to avoid freezing:
- Learn main freeze zones and avoid them (refer to the map below).
- If partially frozen but can still move, return to the entry gallery and wait there. This area is marked as "Unfreeze" on the main map and can be used both in-bounds or out-of-bounds. The two sides are separated by an invisible wall but unfreezing works.
- Heater room may be useful in some cases, although you freeze back soon after leaving it.
- Some freeze zones (such as the limp walk zone near the end) only affect the wayfarer inside them; if you manage to walk out of the zone you'll regain "normal" motion (but may not regain full mobility in some cases, depending what else got activated along the way.
Entrances[]
At the start of the level[]
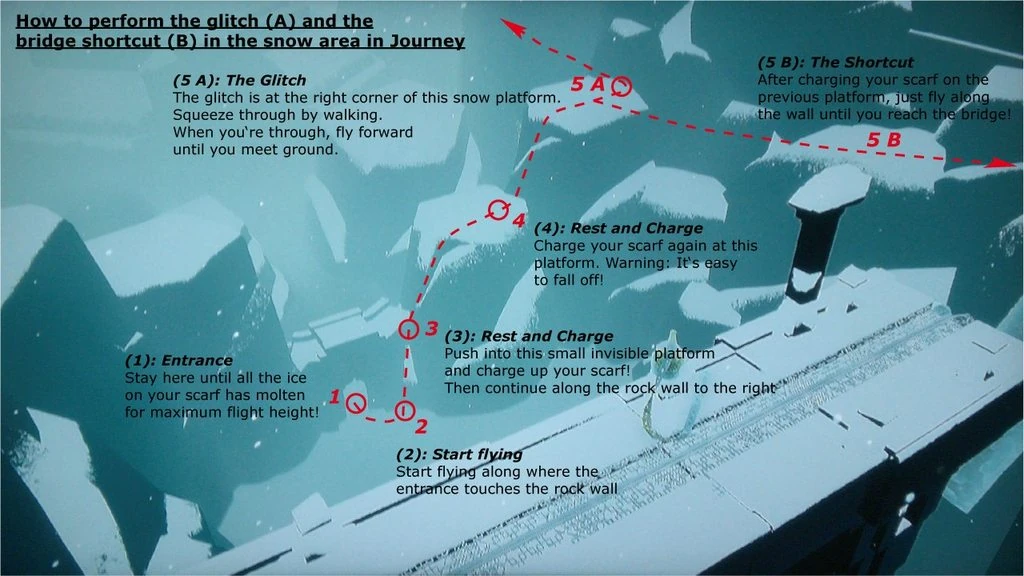
The Entrance is where (5A) is.
You go out of the Thawing Room (1) at the beginning of the level and stick to the left wall, this will prevent freezing.
If you do freeze, go back to the last room before entering snow and heat up at the left wall, jump up. Left wall when the Tower is behind you.
Once you made it up to point (3) you have to push/walk or you will get pushed back and fall down. The invisible platform means the solid ground is a bit below the visible ground, your feet will vanish in the roof.
(4) Here you get pushed back too, but with just one jump forward and then walking you can recharge your scarf for the next step. You have to fly up to the next platform.
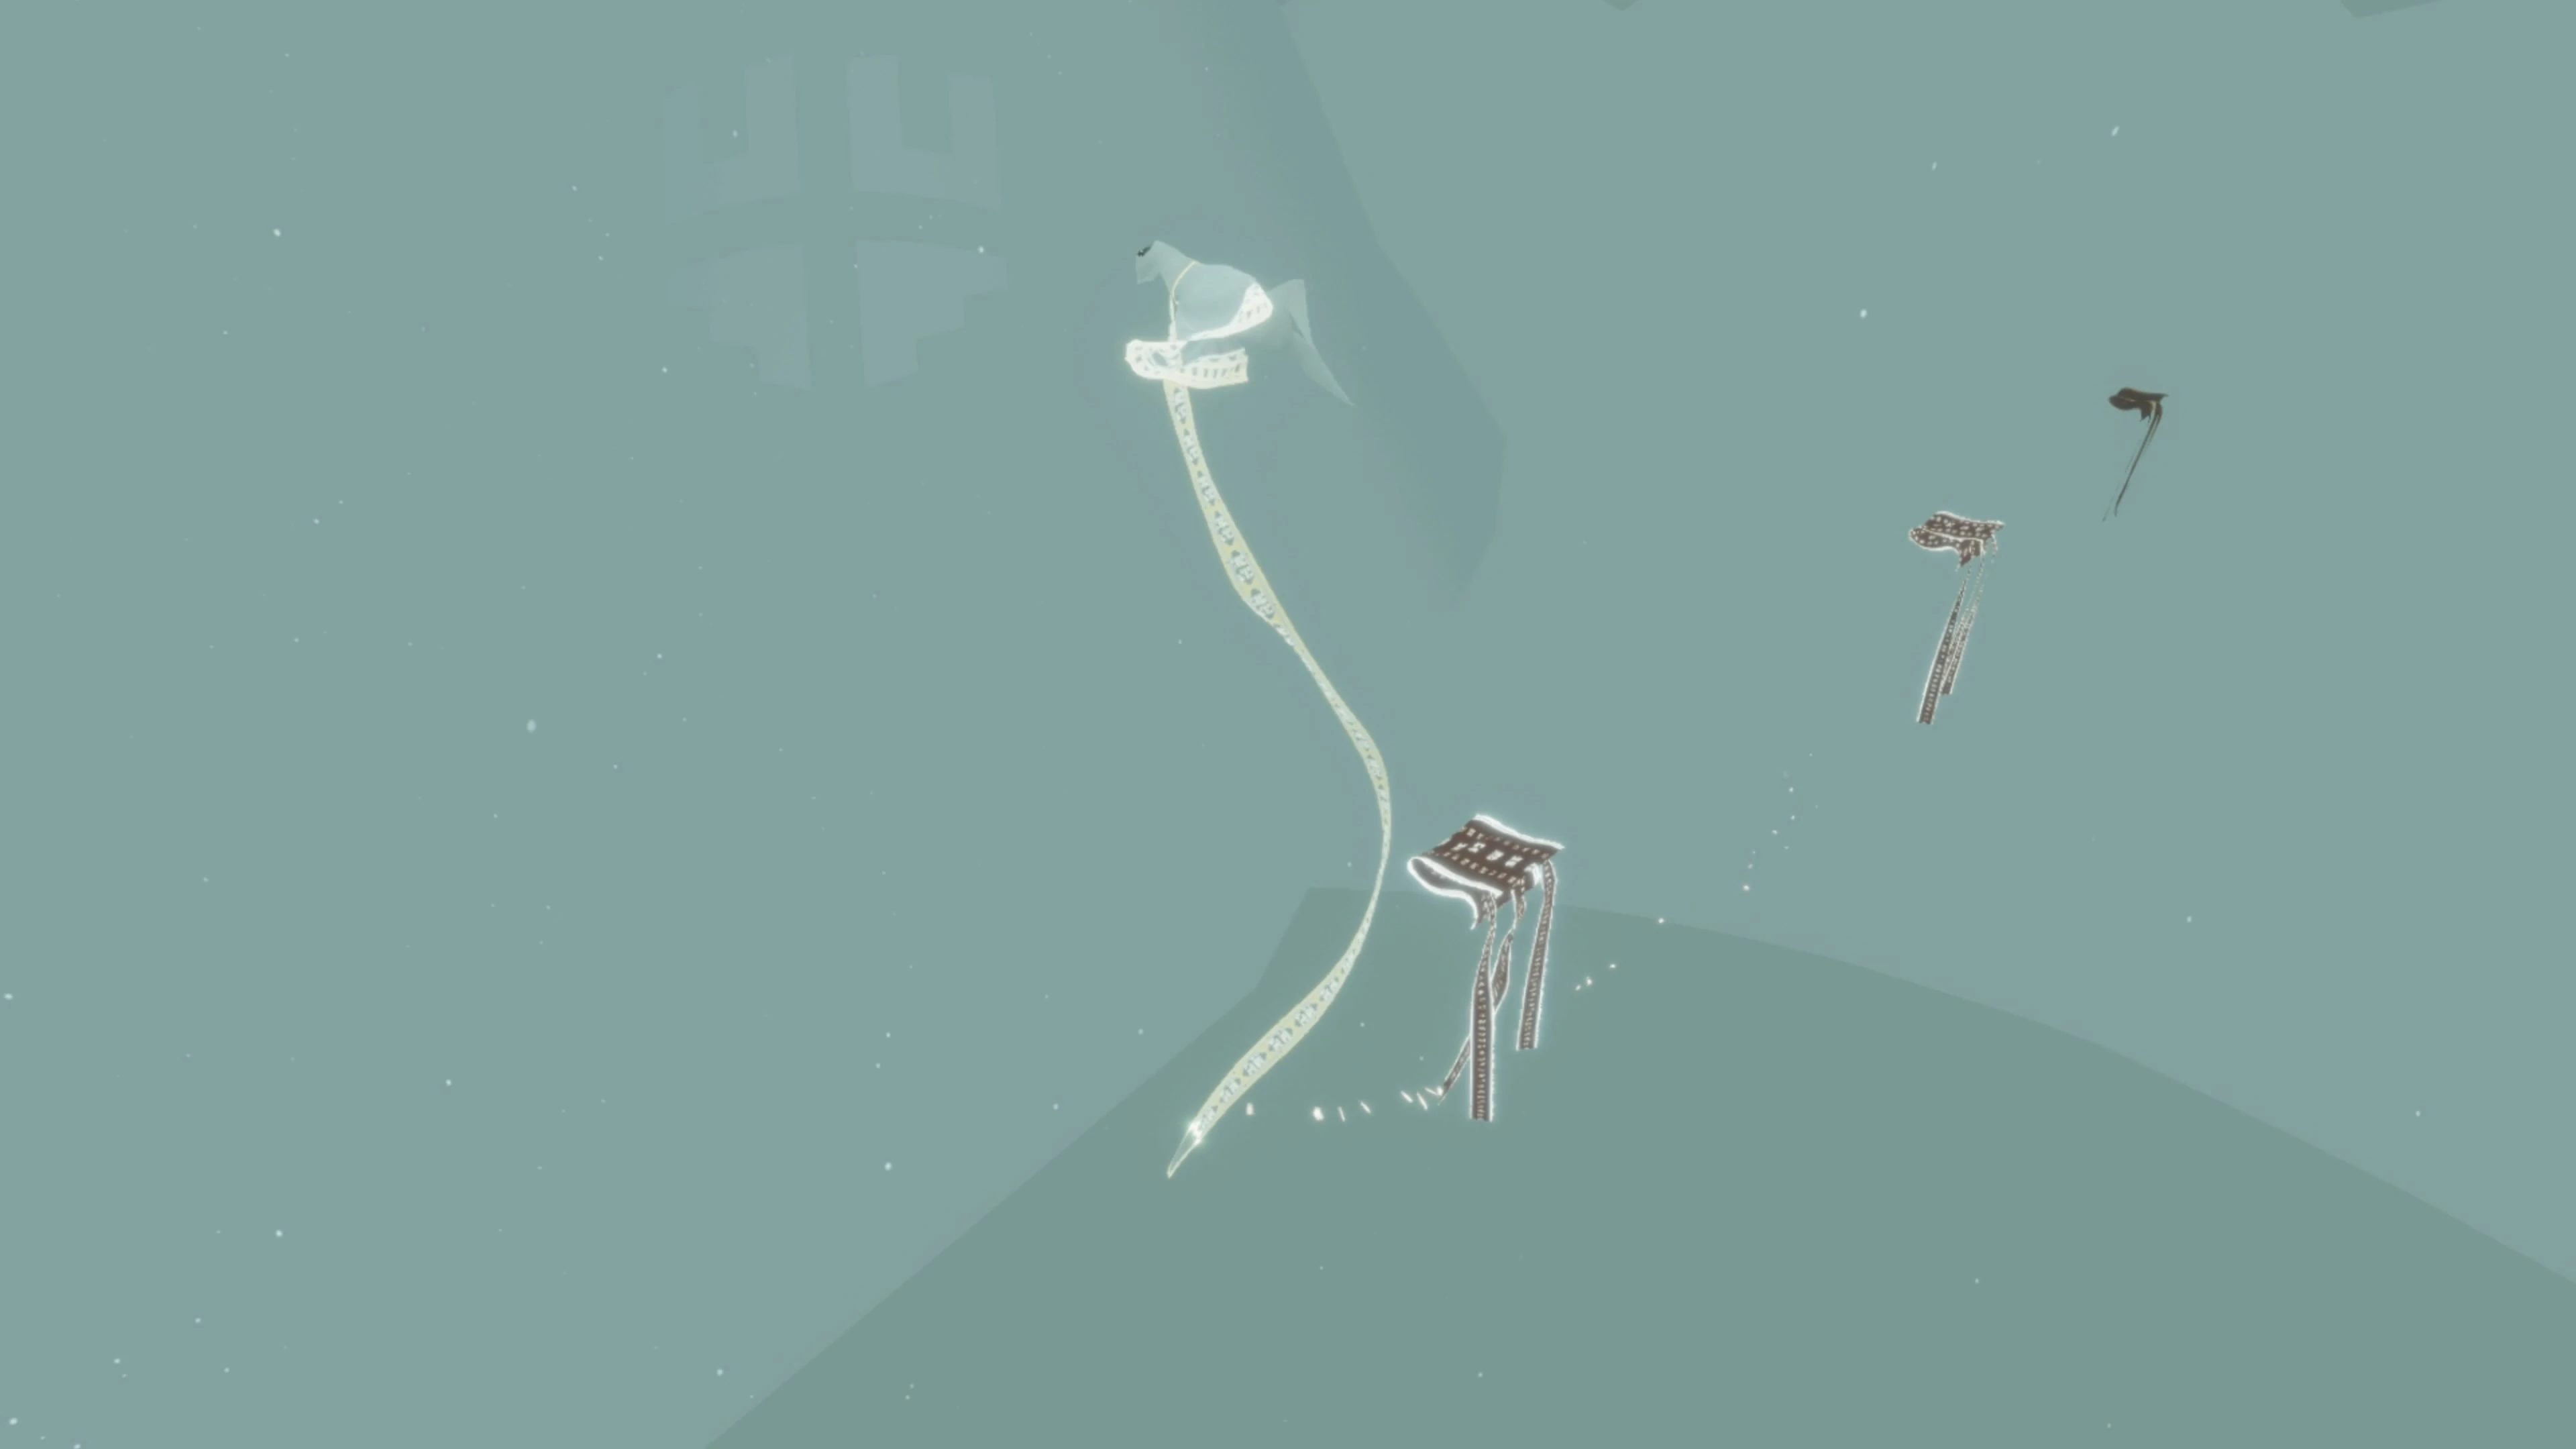
(5a) You have to land once where the circle in the picture is. Then you can walk near the wall forward to the left-pointing arrow. You cant push through the wind barrier there to go behind that platform into the OOB area, if you don't land and walk forward. The mountains behind are not solid, just a warning. You can either fly further or just let yourself fall down.
Video showing the path:

Climbing the heater room.
In the heater room[]
It's a bit tricky, but there is a nice method:
- Stand on the beam in the top of the heater room and drop off of the edge, aiming for the corner of the beam and the wall.
- If you know how to aim your camera down and dive, you can kind of do the same here. Its a very quick moment, you just hop off the beam and fall down into that corner.
- You kind of need to push your character into the corner. Don't just drop down but push into the wall!


Ice Cave: The entrance hole is directly at the ceiling in that corner.
At the ice cave/shortcut cave[]
Alone or if you lead your companion to the left as you enter the patrol field and hug the wall, you will lead them to the last glyph.
There is an easy entrance to Snow OOB to the right of the glyph. Go to the right corner in the back of the glyph room and jump up, push through ceiling/corner-edge.
Careful if one of you or both are red. It can be tricky to charge the scarf to either help them to come OOB too or return to normal level. Its easy to get parted on different sides, remember a Reddie's scarf loses its fly power due to cold.
Hidden Valley entrances[]
The Hidden Valley area is a separate out-of-bounds section in the middle of the level, surrounded by the entry area, Patrol Fields and the Playground. This OOB area is often overlooked because its presence is not obvious without a map, but it's well worth visiting as it contains a few unique sights.
Charge Boost from start[]
The recommended entry method is by Charge Boosting from the entry area (from the same rock you climb on your way to main OOB). Fly above the bridge and past the Patrol Fields wall but be careful not to activate the freeze trigger in Patrol Fields. This method is shown in the video below. A variation of that method would be to land on top of the wall on its North end (right if looking from the bridge) and then simply walk/fly into the Hidden Valley.
Through Patrol Fields[]
Another way is to climb over one of the rocks on the right (North) side of the Patrol Fields soon after crossing the bridge. There is a rock that will recharge your scarf and eventually will let you fall between the rocks. This path is more a curiosity since to use it you'd have to activate the freeze trigger in Patrol Fields.
Exits[]
Ice Cave exit[]
If you are in OOB and want to continue into the patrol field, you can enter at the ice cave and then hug the cliff walls until you reach the end of the patrol field. Stay close to walls and cliffs - the war machines can get close. You may still get attacked, but the risk is lessened.
Hidden Valley exit[]
On the West side of the Hidden Valley it is possible to squeeze between the huge rock and the tower at the end of the Patrol Fields. The rock is the one where WM2 is stuck, when you see its tail go around that rock leaving it on your left hand side, there is a tricky part with a locked camera but if you just keep hugging that rock you'll soon drop into an invisible gap between the rock and the tower landing in-bounds right at the end of the Patrol Fields.
Balcony tower exit[]
Another option is to drop back into the level from one of the towers near along the balcony. Towers are reachable from the nearby edge of the Final Walk plateau.
Death March exit[]
Depending on where you enter the final Death March area, it may be possible to return in-bounds. For example, if entering from the South-West corner, walk across (East) until you see the towers and gates that lead to the Death March inside the level.
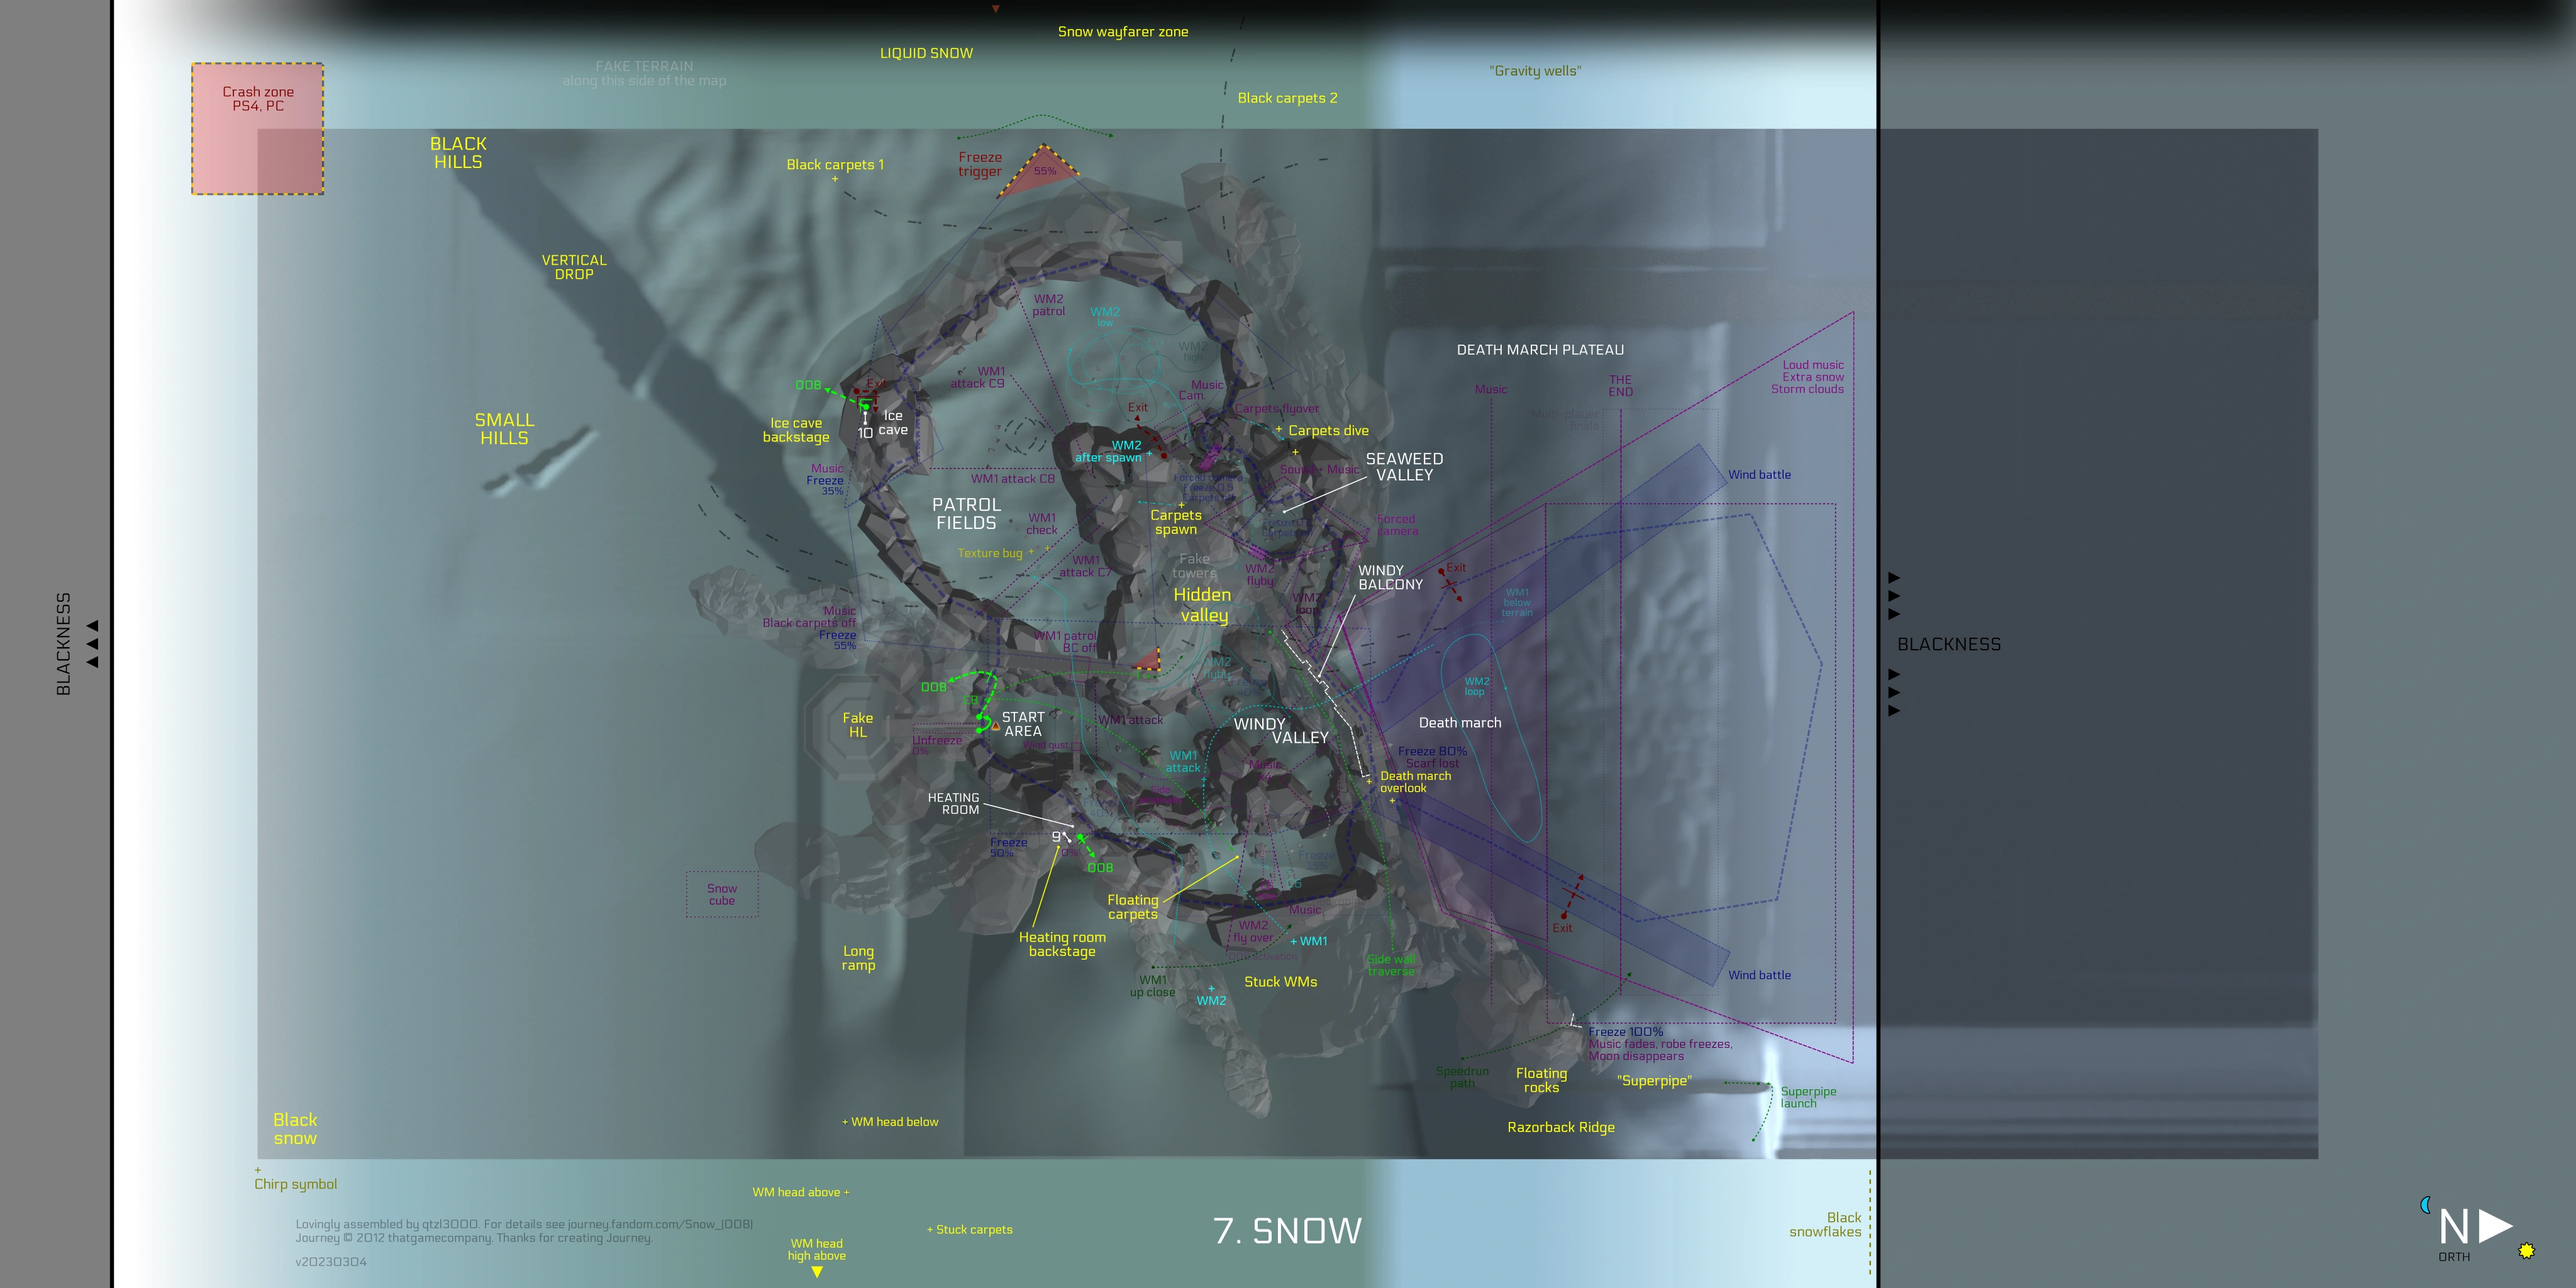
Maps[]
Level map[]
This map shows a general view of the level including key sights, landmarks and navigation elements.
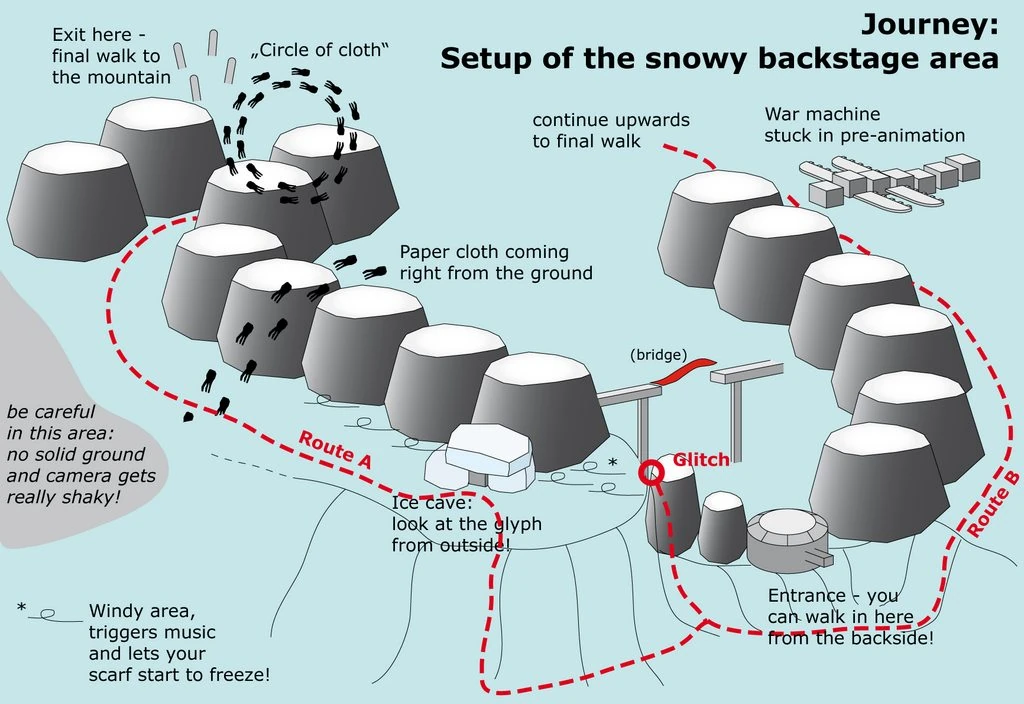
Additional maps[]
This basic map shows an overview and common paths in Snow OOB. Route A is also called "West/Left side route" and Route B is "East/Right side route".

The East side is the shortcut!
Sights[]
To give you the chance to explore and find things on your own, sights are featured on their own article.
See here for the list of sights that got added on the Wiki (there may be more and its up to you to discover and show to Companions your own favorite sights).
If you entered OOB at the start of the level with a Companion its convenient to wait together at the Snow Beach right behind the Tower resemblance / Thawing Room / start building. Then both can decide which direction to go: two paths to choose from, West or East side. (or decide while flying over the Tower resemblance "left or right").
- West side may have more stuff to see. Black Dots, Black Carpets/Fake Carpets (those are on several places), Liquid Sand....
- East side is often just used to skip the level (shortcut).
- Visit the heater room from the other side (even activate it or enter the level again)
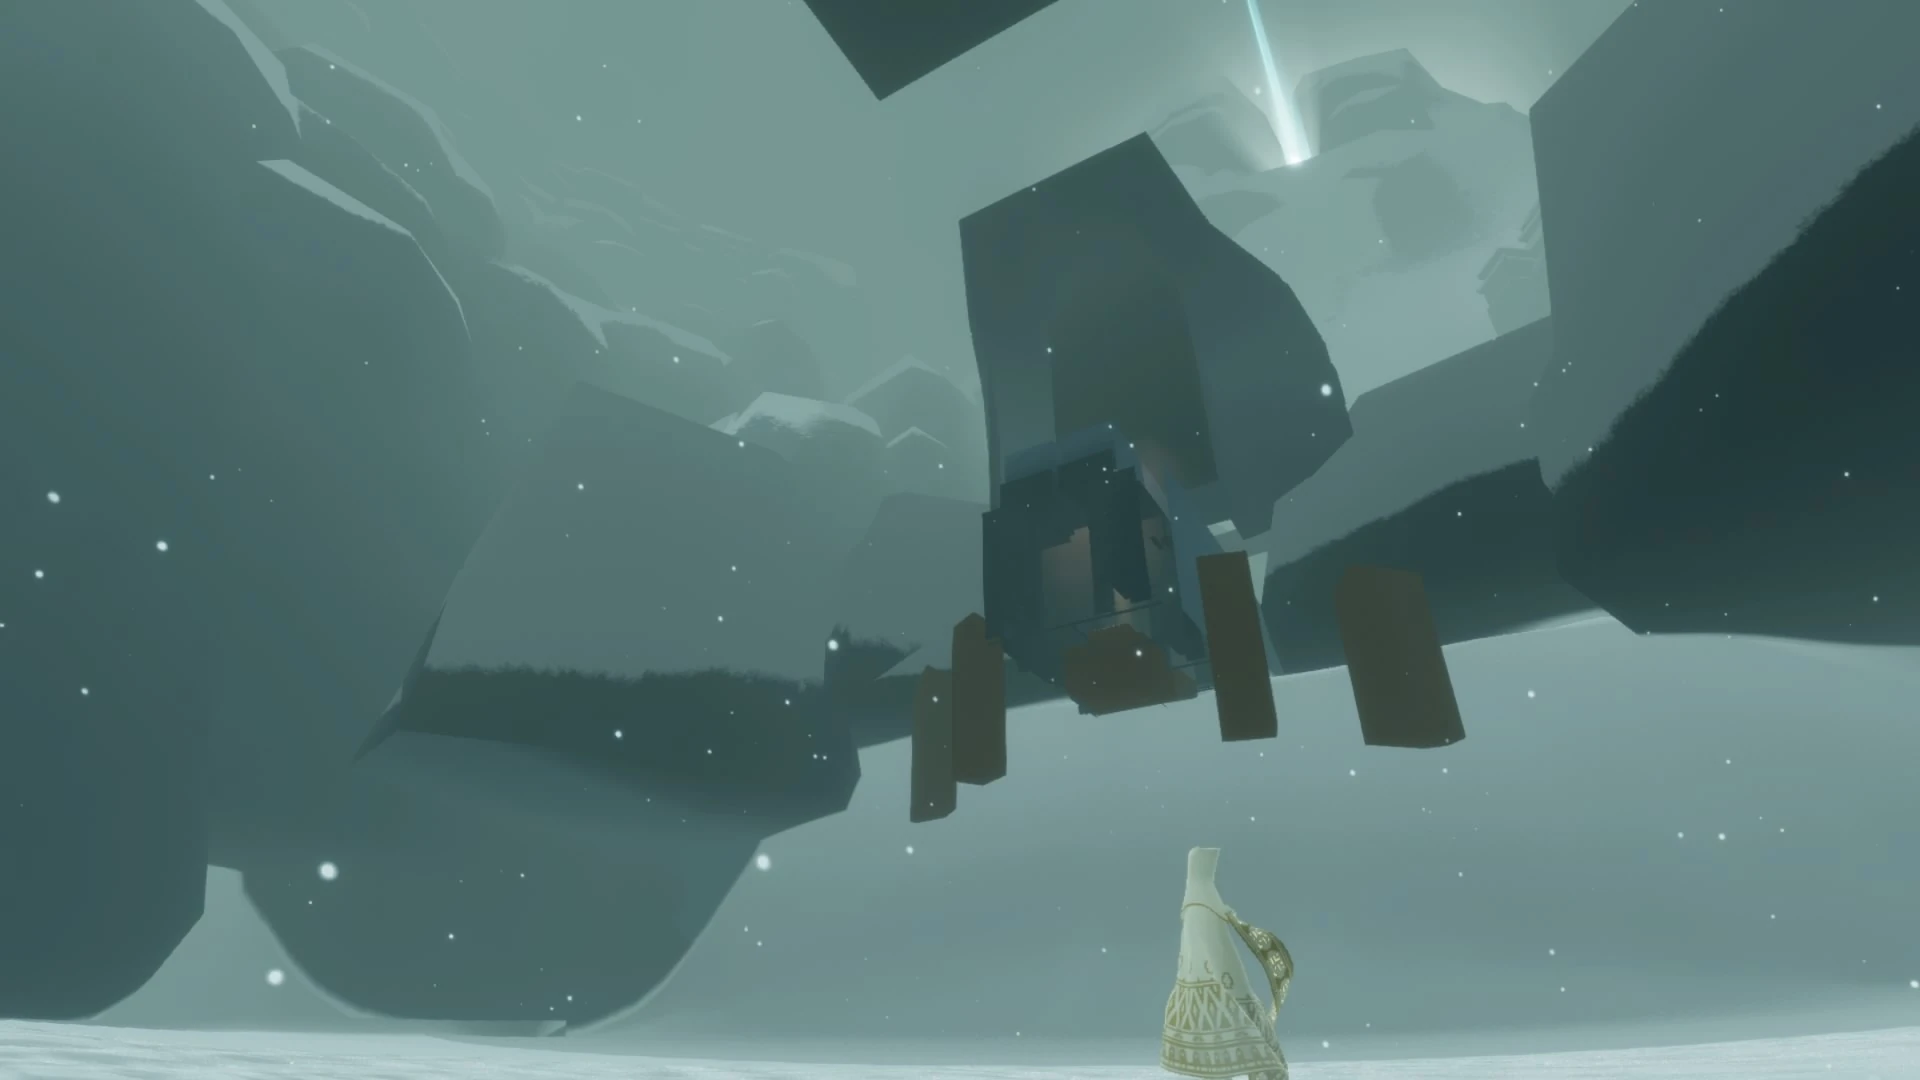
- find two stuck in the air War Machines.
- There is plenty of stuff on the East side too if you are curious enough!
Trivia[]
About WM triggers
| “ | The first WM trigger is only effective for one Companion though, you won't be able to see their movement.
The third WM trigger displaces them <the three carpets> too (as well as two of the carpets floating before the heater room), but the distance is too great to stay connected while hoping to witness their disappearance. |
„ |
| ~ Ȃ̸̈́p̶͆̀n̸̾͠ó̸͘ , 2020-07-08 on Discord |
Quotes[]
. . .
See also[]
Broadly speaking, a glitch is where something in the game does something it wasn't meant to. We do not distinguish between a "wanted Glitch" and actual bugs.
Browse Categories (bottom of articles) to find more related articles:
- Category:Out of Bounds, Glitch per Level: Category:OOB-Levels
- Category:Challenges , Category:Tricks
Robins Guide for Newcomers . 26 Minutes, full of tips, tricks, dos and don'ts.
Expert Mode introduction article to everything beyond the most basic gameplay. Expert Mode topics: